
How to implement application automation? HMI programming course. Part 9.
During the course you will learn, among others:
- what are schedules for?
- how to add a schedule to the designed application,
- how to run and change schedules in the application.
In the previous episode "How to create and modify recipes? | HMI panel programming course episode 8” your HMI panel " application has been enriched with a recipe function. In this episode, you will move on to basic automation of your application using schedules.
HMI panel programming - course for automation engineers
- 1. How to create your first HMI panel project?
- 2. How to configure application settings? Interface and basic functions of the development environment.
- 3. How to add and edit operator screens?
- 4. How to design a graphical interface? Basic graphic objects used in HMI systems.
- 5. What types of variables are used in operator panels?
- 6. What are macros and how to use them in an HMI application?
- 7. How to configure alarms in operator panels?
- 8. How to create and modify recipes?
- 9. How to introduce application automation?
- 10. How to add the process file logging function? How to save data?
- 11. How to ensure communication with the PLC controller? Driver configuration.
- 12. How to limit access to the application? Operator passwords.
- 13. What additional functionalities may be useful when designing an applications?
How to add a new schedule?
On the left side of the design tree, select the Schedule option twice and select the first item, assign the name start and the appropriate variable.
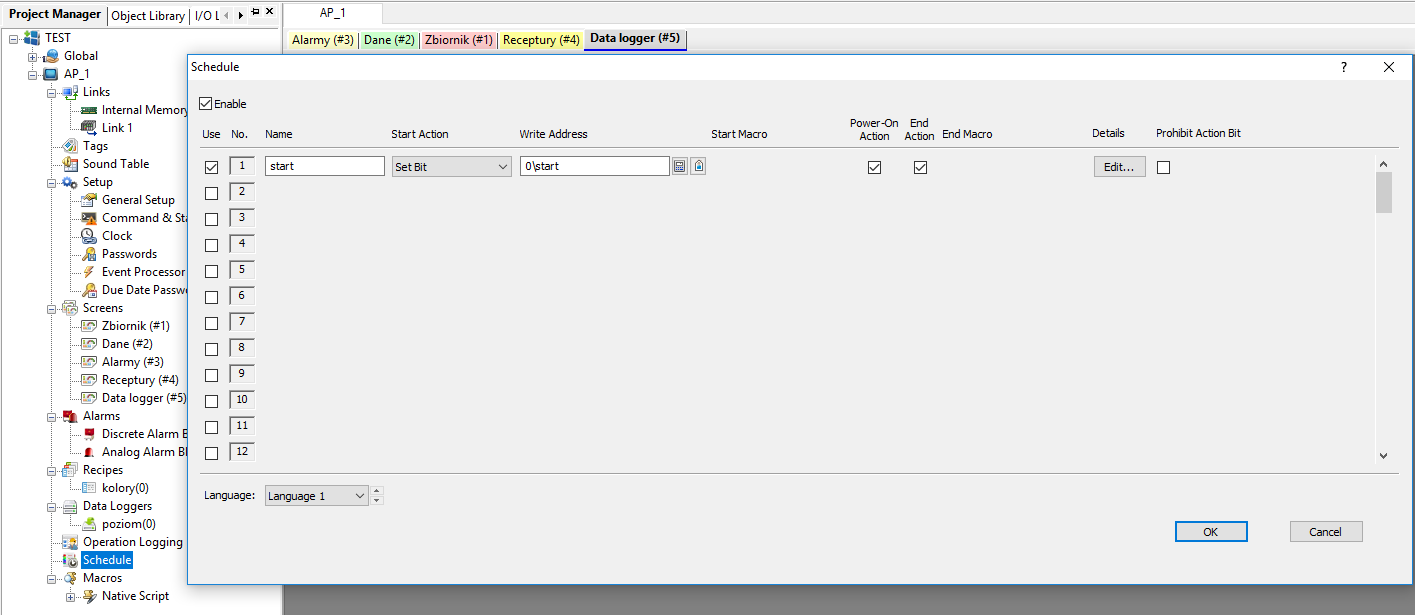
In the next step, go to the Details tab using the Edit button, which can be found on the right side of the selected item.
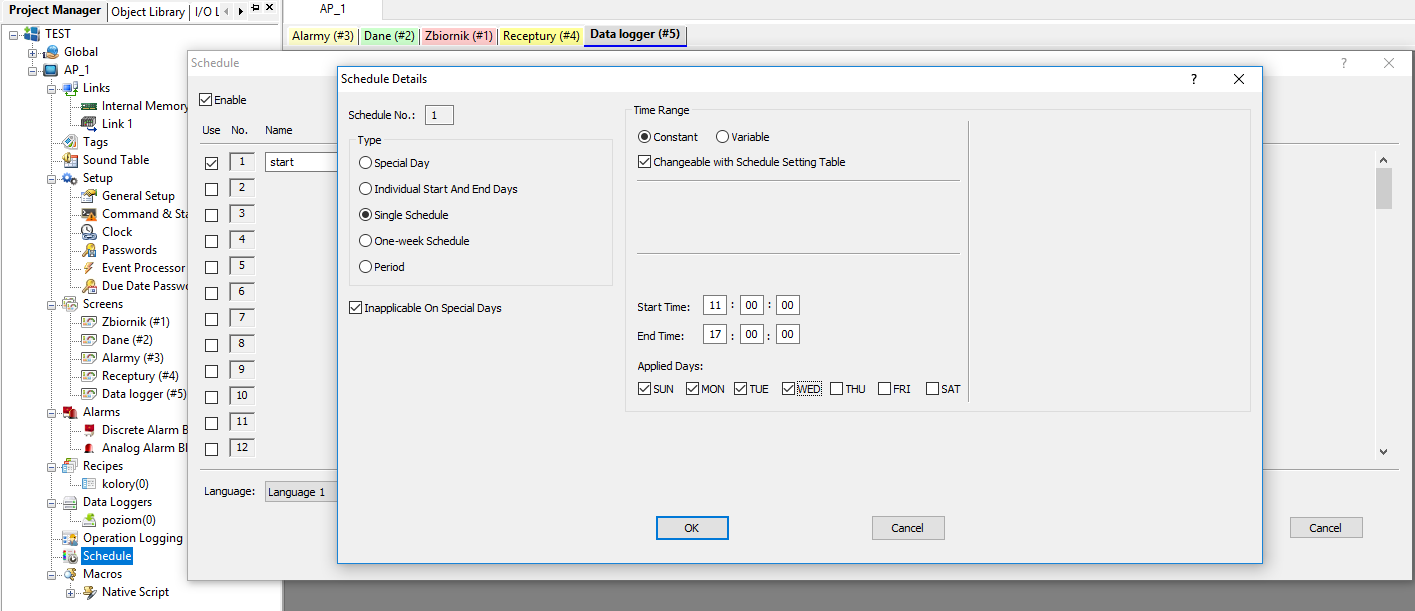
In the window that appears, you can configure the schedule parameters. In the Schedule Details window, select Changeable with Schedule Setting Table. By selecting this option, you can change the schedule while the application is running.
In the field below, define the time during which the given schedule is to be executed (in this case, from 11 a.m. to 5 p.m.) and the days of the week on which this operation will run.
Close the configuration window with the OK button , and then create a new screen called CALENDAR in which you will place an object called Schedule Setting Table.
"How to add and edit operator screens? | HMI panel programming course, episode 3".

Place the object on the screen (by default it should contain a defined variable schedule).
Remember to add the Close and Calendar buttons, which will open and close this window respectively (copy the buttons from other screens and configure them). Take a look at the Schedule Setting Table object, choose the colours to make the window functional, and then save and compile the program to test it in the simulator.
Testing the schedule in an offline simulator
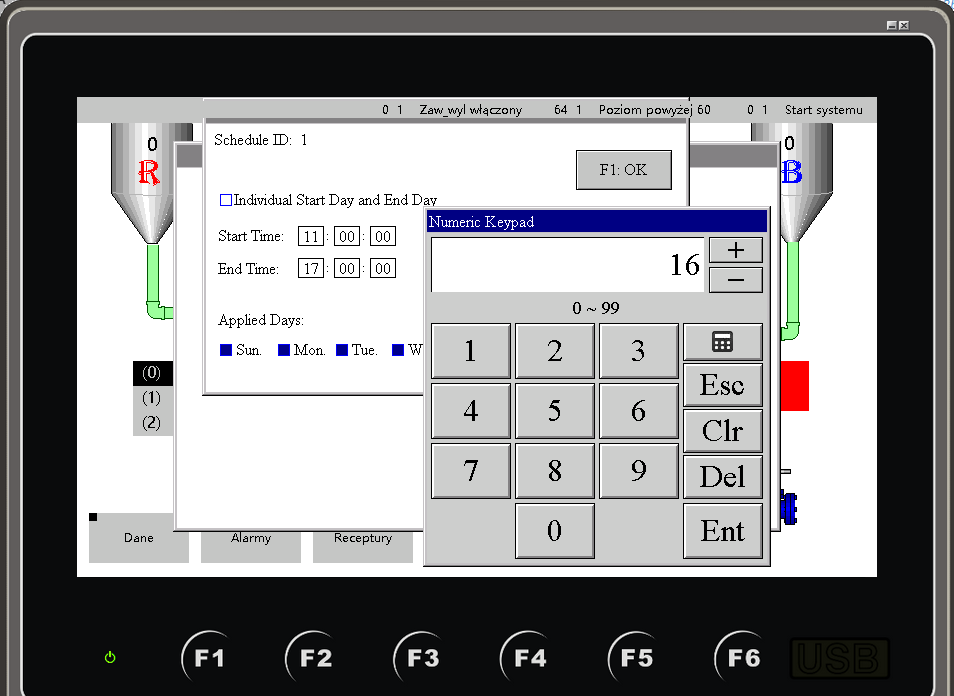
If the program has been compiled correctly, after starting the simulation, you should see the water filling sequence start automatically, without the need to use the START button.
To test the operation of the schedule, enter the CALENDAR window and, using the set button in the schedule table, try to change the hour or days of the week corresponding to the START button.
If you have any questions at this stage of the course, write them in a comment - we will be happy to answer :)
In the next part of the course "How to add the process file logging function? Saving data | HMI panel programming course episode 10" you will learn:
- what is the data recording mechanism used for,
- how to add and use the Data Logger functionality in the application,
- how to add a table and graph of historical data.
Authors:
Ewelina Szędzioł
Paweł Podsiadło
