
How to create and modify recipes? | HMI programming course. Part 8.
During the course you will learn, among others:
- how to create a recipe in an HMI panel application,
- how to upload and download recipes to/from the PLC controller,
- how to manage recipes and change their values.
In the previous article in the series "How do I configure alarms on operator panels? | HMI Console Programming Course. Part 7" described how to add alarms and change their parameters.
In this part of the course, you will add another function that is especially useful in processes that require regular changes in values, e.g. the amount of mixed ingredients. You will also add the ability to control the percentage of each of the three substances in the mixed liquid.
HMI panel programming - course for automation engineers
- 1. How to create your first HMI panel project?
- 2. How to configure application settings? Interface and basic functions of the development environment.
- 3. How to add and edit operator screens?
- 4. How to design a graphical interface? Basic graphic objects used in HMI systems.
- 5. What types of variables are used in operator panels?
- 6. What are macros and how to use them in an HMI application?
- 7. How to configure alarms in operator panels?
- 8. How to create and modify recipes?
- 9. How to introduce application automation?
- 10. How to add the process file logging function? How to save data?
- 11. How to ensure communication with the PLC controller? Driver configuration.
- 12. How to limit access to the application? Operator passwords.
- 13. What additional functionalities may be useful when designing an applications?
Preparation of variables used in recipes
Open the Tag Table window by double-clicking on the Tags item from the design tree and create another folder called recipes. To do this, right-click on the Internal Memory item and select Add Subgroup.
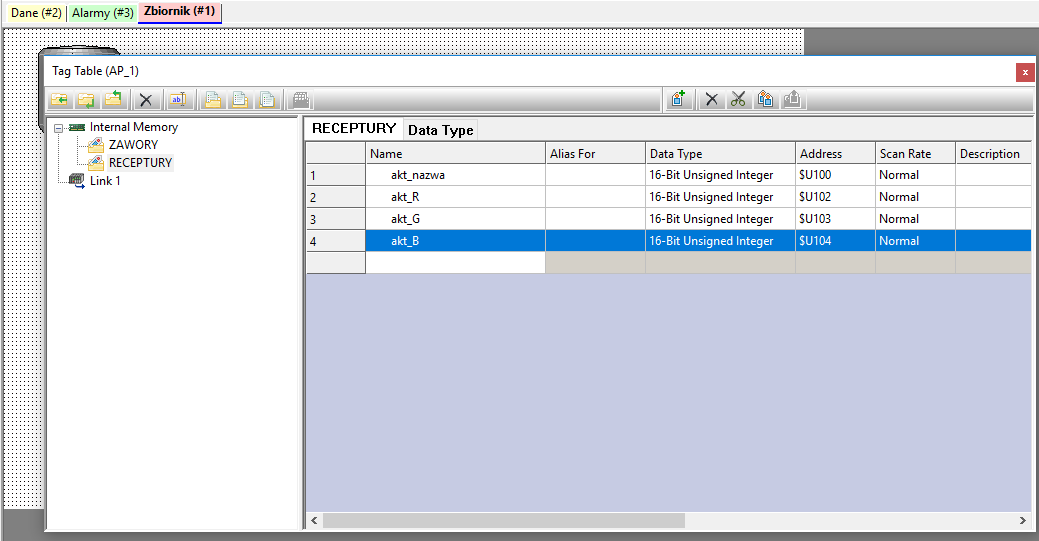
Add the above items to the folder. Each of the variables will be used to change the value in order to change the recipe for the final product.
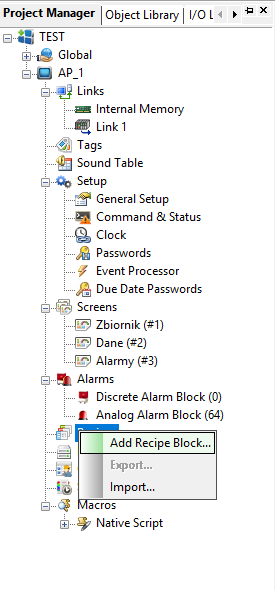
How to add a new recipe?
Select Recipes from the design tree and click Add Recipe Block.
Open the Recipe Block window, where you can set the scope of saved configurations and the program memory allocated to them. Familiarize yourself with the features of this window.
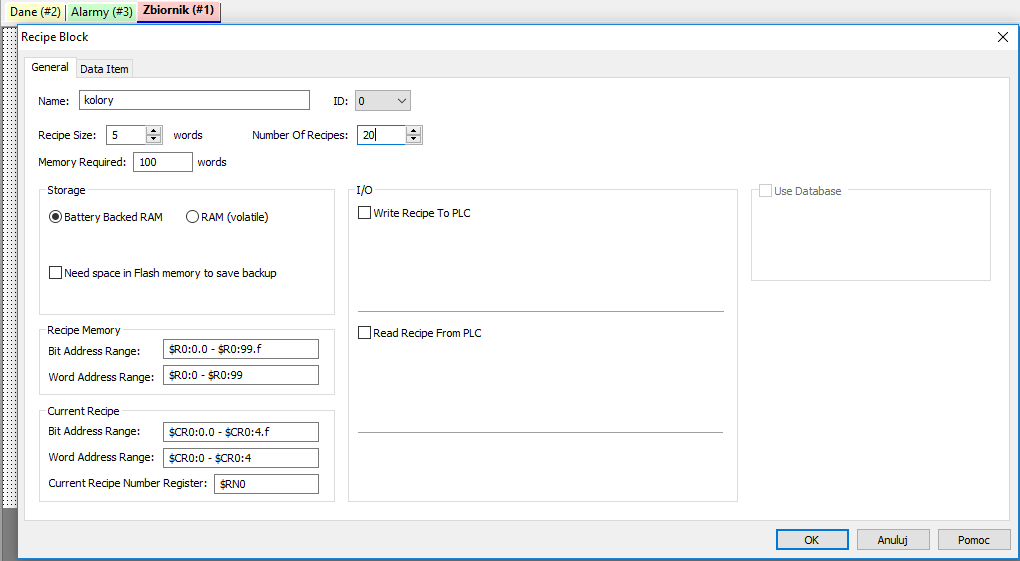
Pay attention to the options that allow you to upload and download recipes to/from the PLC controller.
Check the Write Recipe To PLC option and select the tag named AKT_NAME to check the status or make changes to the settings for loading the configuration to the device.
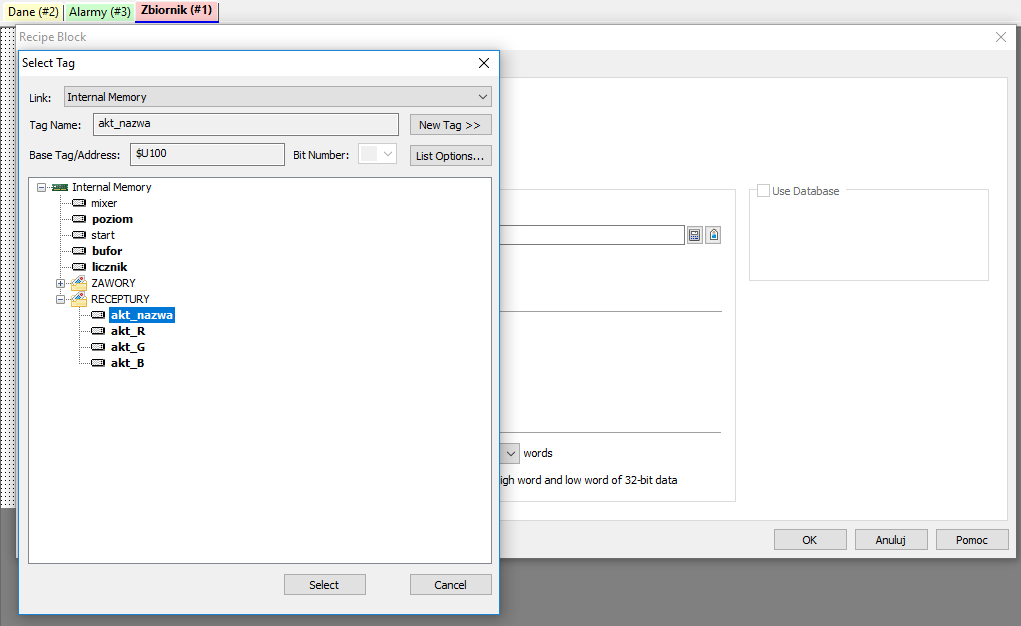
Confirm the variable selection with the Select button and go to the Data Item tab in the Recipe Block window.
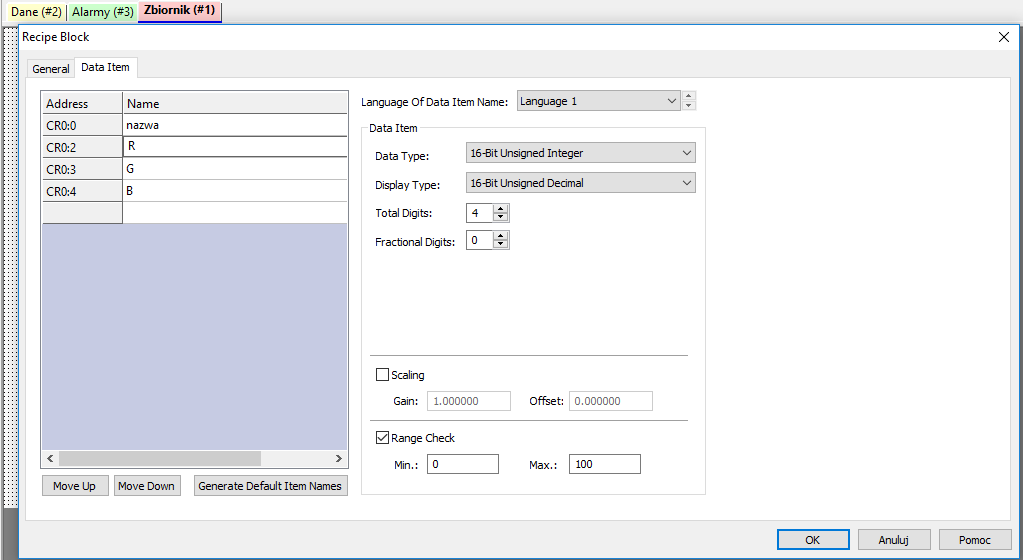
Define the type of the first argument, i.e. Name, as Byte Array. You will use this argument as the name saved in the application in ASCII format. Set the Total Character value to 4.
Leave the remaining arguments that refer directly to the component values of each color in the default type, only changing the Range Check option so that their values are read in the range from 0 to 100. You can also change the name in the Name field in the General tab block on Colours.
Similarly to the previous parts of the course, now add a separate screen called RECIPES. Remember to add the appropriate buttons.
You can learn more about adding new screens to the application in the episode:
"How to add and edit operator screens? | HMI panel programming course, episode 3"
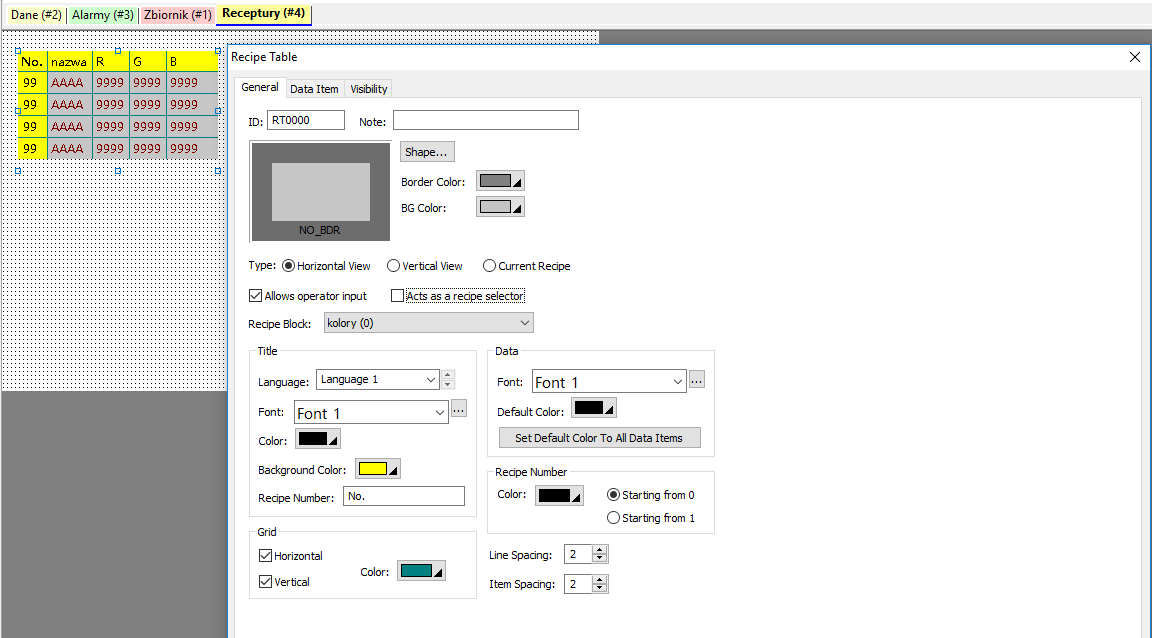
Add a Recipe Table object to the new screen. By double-clicking on the added object, enter its configuration, and then in the Recipe Block field, select the recipe you created called colours (0) and confirm the changes made with the OK button. Add the Scroll Bar object to the recipe list, available in the Objects menu and the More Buttons tab.
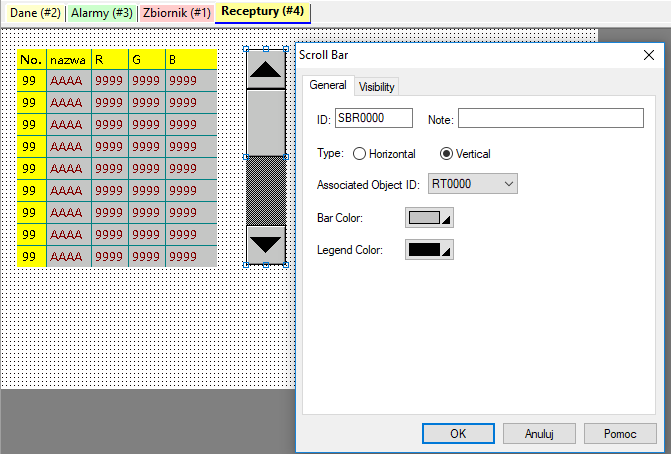
Change the orientation of the sliding bar to vertical and assign it a controlled object. The program automatically allows you to select only those objects that are on the currently edited screen. Adjust the size and position of objects and their appearance.
Functional expansion of the application
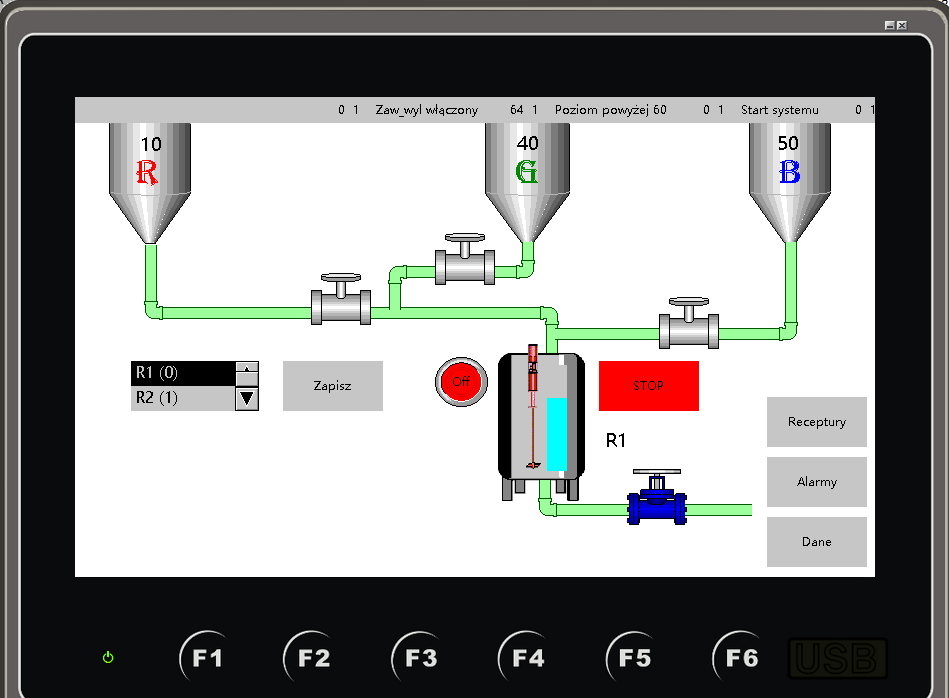
Now proceed to adding the remaining two tanks corresponding to the colours: green G and blue B. Copy an existing tank with the letter R and place it in the upper right corner of your home screen.
Similarly, make a second copy of the tank with its markings and place it in the center of the screen at a similar height as the other two objects.
Change the markings and their colours and route pipelines to them using the Pipeline option from the top Object menu. Adjust the dimensions and shape of the pipes to finally create a pipeline with connections to each color tank. After editing the pipeline, make two copies of the valve located at the connection of the red tank and the main tank and place them on the connection with the container marked with the letter G and B, respectively.
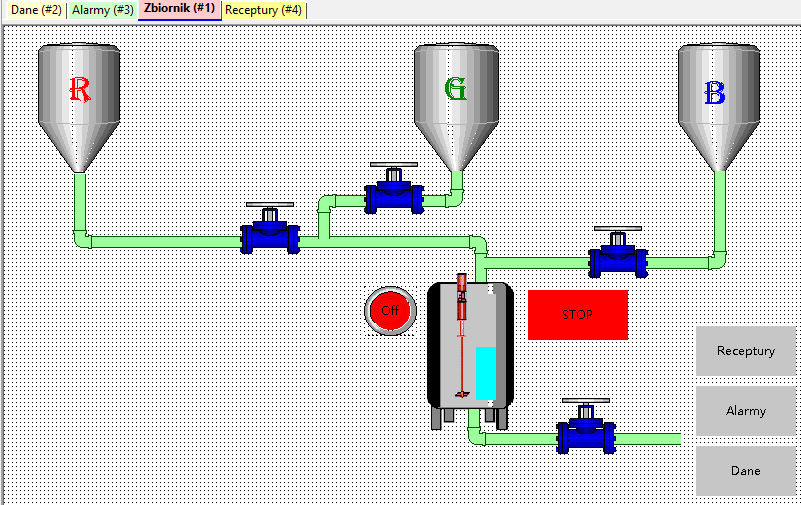
Remember to change the variables that correspond to the valves in the object configuration. This is necessary for the application to function properly. Once you have completed all of these steps, the TANKS screen should look similar to the one below.
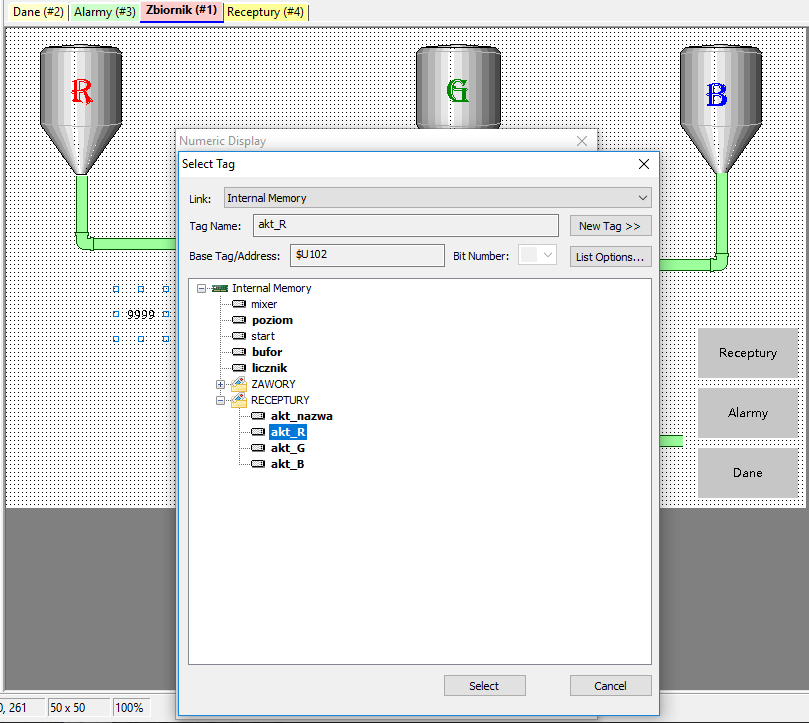
Assign an appropriate variable to each object, which is located in the recipe folder you created. Place blocks displaying values next to each of the containers corresponding to three colours.
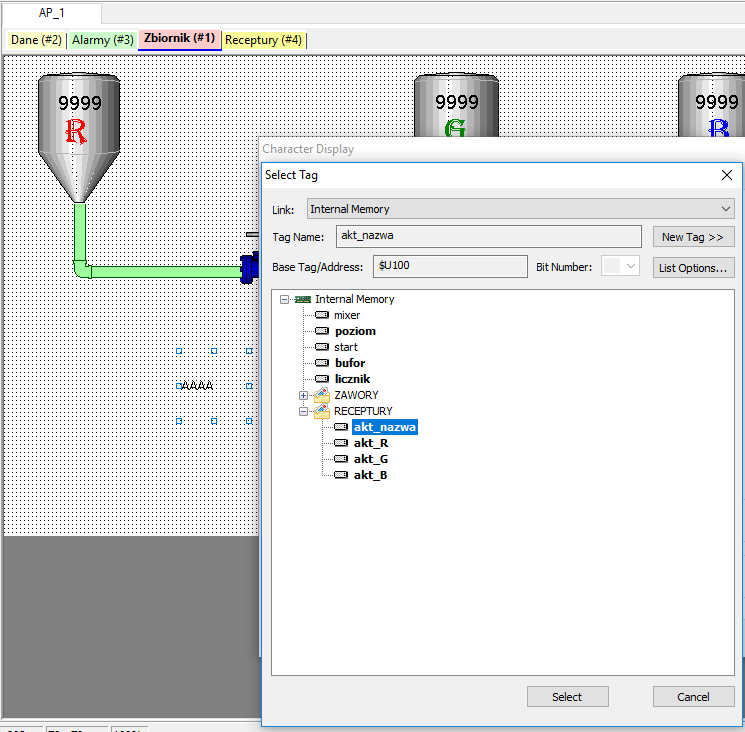
Now add the ability to display the name of the current recipe. You can implement this using the Character Display object, which you assign to the AKT_NAME tag.
Place the object near the button that starts the entire program (START).
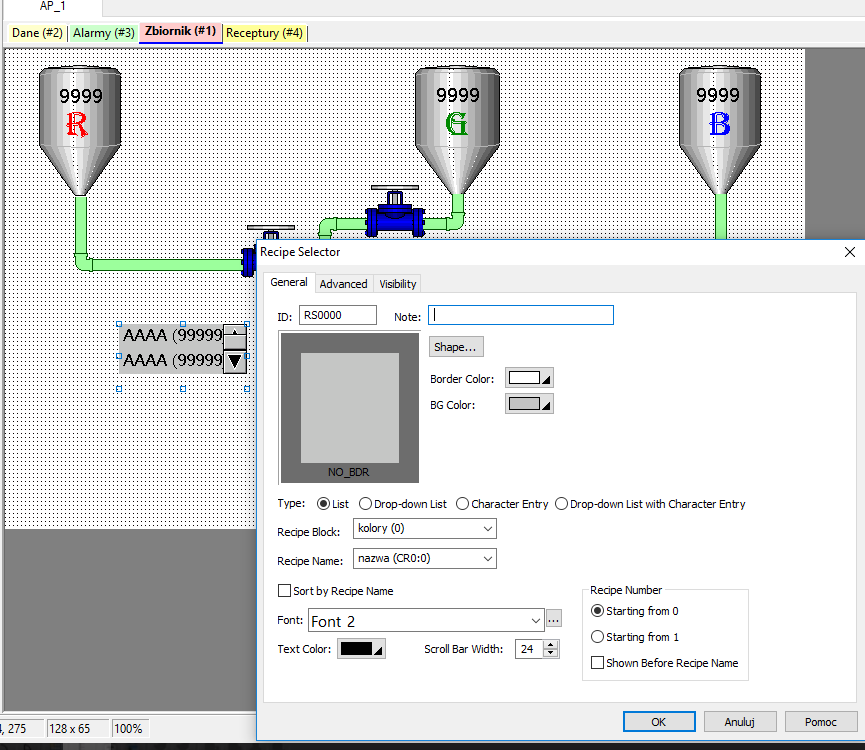
Then add a Recipe Selector object, which will allow you to select recipes previously defined in the application. In the Recipe Name window, select the recipe you have previously created (only one option will appear), select the font according to your preferences and exit the configuration window with the OK button.
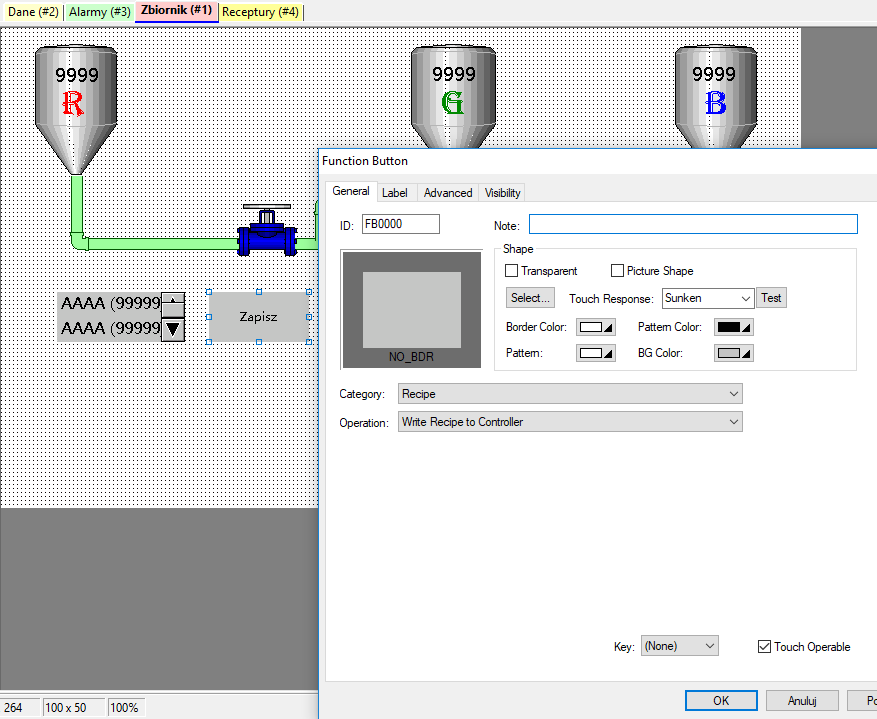
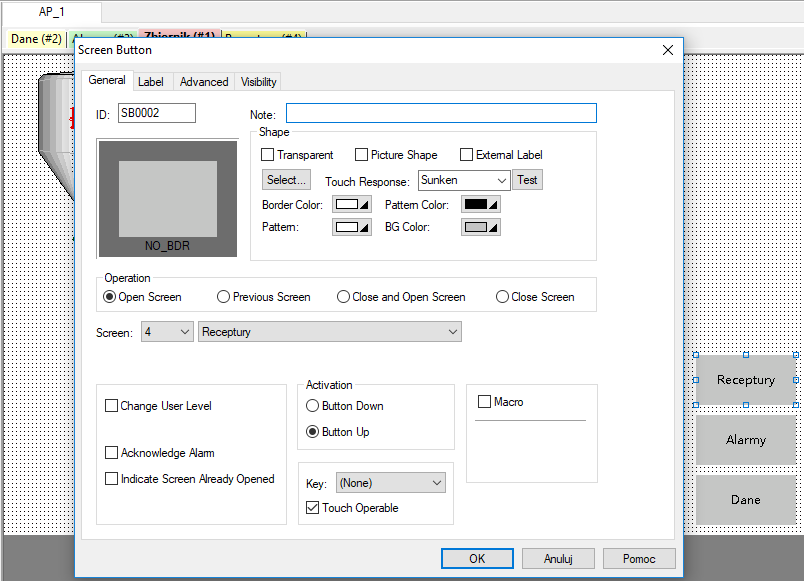
Now add a new Function Button (find it in the top Object menu) and place it next to the added recipe selection object - rename it to SAVE. Assign the Write Recipe to Controller function to the object. This button will be used to upload a previously defined recipe to the device. You can additionally assign it the Control by Bit function, which can be found in the Visibility tab (the start tag has been assigned to the function).
Completing the macro
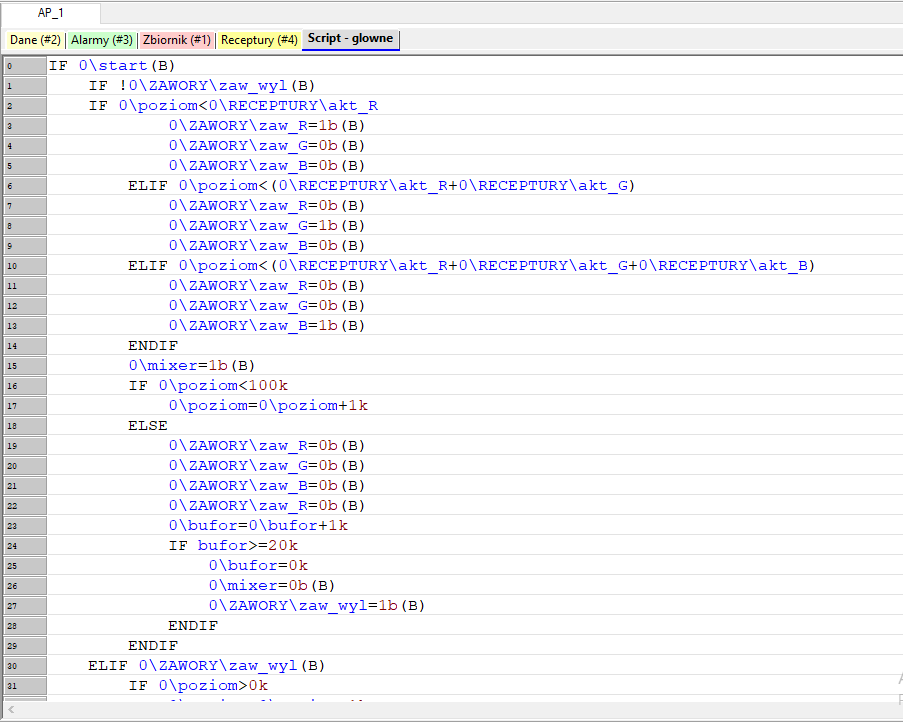
For everything to work properly, you must supplement the code (in the MAIN macro) with additional conditions taking into account the color tanks you have added.
Tip
If you get a code error when compiling a program, it may be due to an incorrect variable reference (typo). Please note that when you write a program and specify a variable, the program automatically marks all the tags recognised in the program in blue.
Your app is ready to test. Compile it, save it and check its performance in the offline simulator.
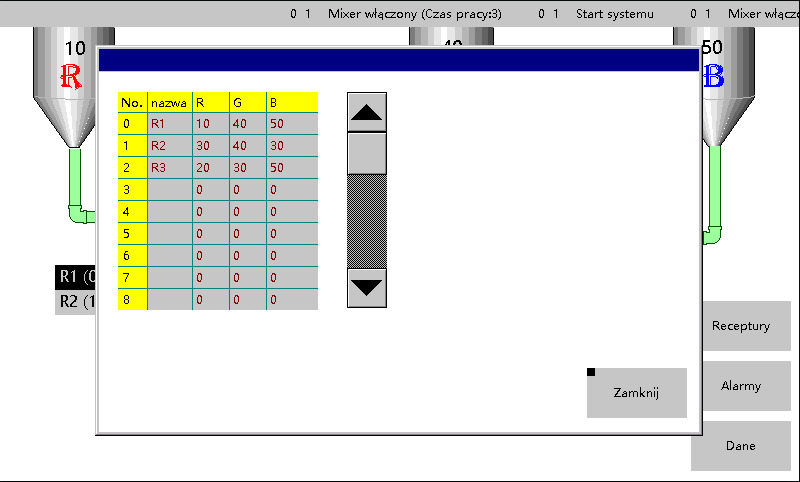
The use of the recipe formerly known as R1 has been given above. After starting the program with the START button and loading the configuration with the Save button, you should notice that each colour is assigned the corresponding values added earlier in the table.
If you have any questions at this stage of the course, write them in a comment - we will be happy to answer :)
In the next part of the course "How to introduce application automation? | "HMI panel programming" course, episode 9" you will learn:
- what are schedules for?
- how to add a schedule to the designed application,
- how to run and change schedules in the application.
Authors:
Ewelina Szędzioł
