
How to create your first HMI panel project? | HMI programming course. Part 1.
During the course you will learn:
- How to create your first program in a development environment
- How to configure the connection between the computer and the operator panel
- How to easily connect an HMI panel to a computer
Welcome to the course on creating applications for HMI operator panels
If you are looking for practical knowledge about programming operator panels, this course is for you! By going through the lessons - step by step - you will learn how to program and configure operator panels using the Astraada HMI as an example, create a complete application and learn how to use the Astraada HMI CFG software.
HMI panel programming - course for automation engineers
- 1. How to create your first HMI panel project?
- 2. How to configure application settings? Interface and basic functions of the development environment.
- 3. How to add and edit operator screens?
- 4. How to design a graphical interface? Basic graphic objects used in HMI systems.
- 5. What types of variables are used in operator panels?
- 6. What are macros and how to use them in an HMI application?
- 7. How to configure alarms in operator panels?
- 8. How to create and modify recipes?
- 9. How to introduce application automation?
- 10. How to add the process file logging function? How to save data?
- 11. How to ensure communication with the PLC controller? Driver configuration.
- 12. How to limit access to the application? Operator passwords.
- 13. What additional functionalities may be useful when designing an applications?
Before you start programming…
Before you start the practical part, download the latest version of the Astraada HMI CFG development environment. The advantage of this environment is that it is free and has a simulator, so you will be able to perform and test all the exercises described in the course.
Link to download the software: www.astor.com.pl/wsparcie/dokumentacja-techniczna/id/9593
Select the latest version of Astraada HMI CFG software: 4.0.X.XX
Your first HMI panel project
If you have already installed the Astraada HMI CFG development environment, run it and create a new project.
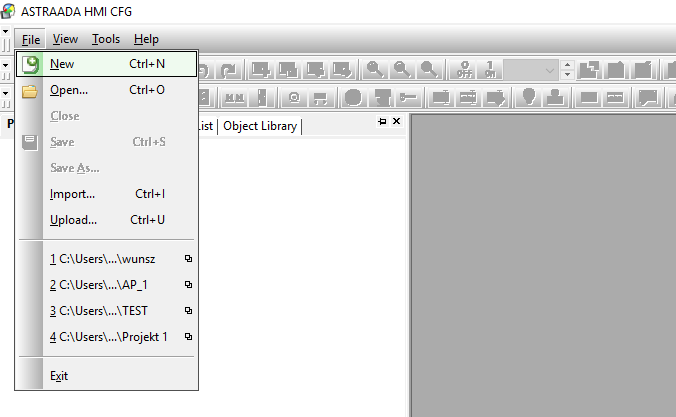
In File tab in the top menu, select New or call this function using the Ctrl+N keyboard shortcut. The New Project window will appear on the screen.
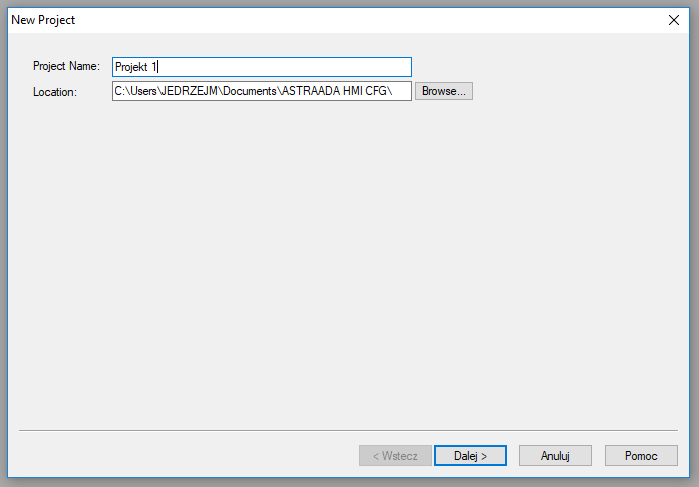
After you complete the name and location of the project, click Next to go to the next New Panel Application project configuration window.
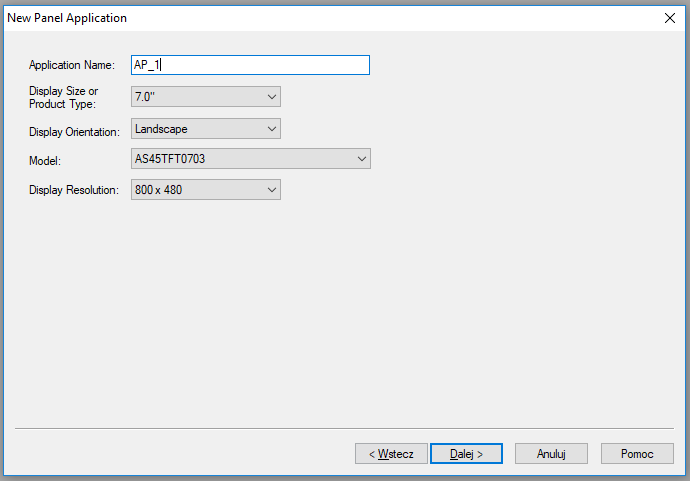
In this window you can name your application for the operator panel. Pay attention to the configuration of the hardware you plan to work with, as this will affect the size and arrangement of objects on the panel screen. Here you can select the screen diagonal of the programmed panel and the orientation (vertical - Portrait or horizontal - Landscape). Select also the model of the panel and its resolution.
After accepting the selected values, go to the configuration window of the driver responsible for communication with the equipment.
Configuration of the connection between the PC and the HMI operator panel
In the New link window, define the name and parameters of the new connection between the computer with the utility software and the operator panel. Using this window, you will also be able to configure the connection to PLC controllers, I/O systems, barcode scanners or other automation devices.
It is worth checking out the full list of free drivers, because there are over 300 of them as standard. You can connect to the HMI panel via Ethernet, RS232 or USB port.
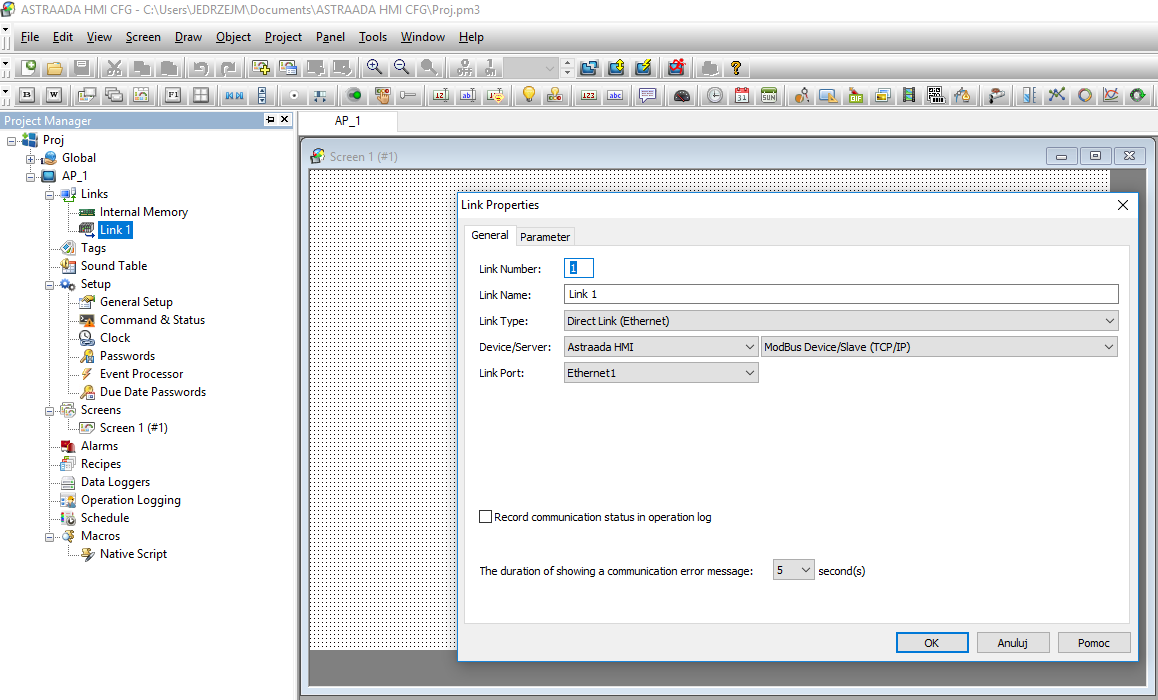
Now use the Ethernet port. To do this, select Astraada HMI as Device/Server and then the Modbus Device/Slave (TCP/IP) protocol.
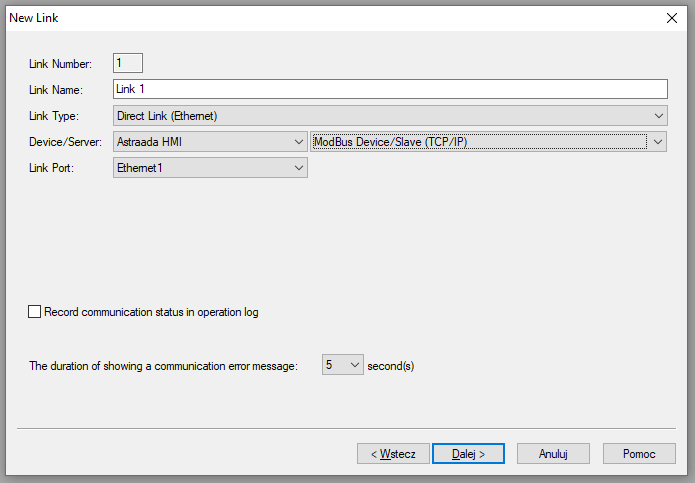
At this point, you can also declare data monitoring in order to use them later in the program, e.g. to display logs (Record communication status in operation log option). By changing the time value in seconds, declare in the lower part of the window how long the connection error message will be displayed (default is 5 seconds).
More information about creating new links and their configuration can be found in the episode:
How to ensure communication with the PLC controller? Driver configuration. | HMI panel programming course episode 11

Then, in the Parameter window, select the appropriate parameters for the Ethernet connection:
- IP Address – IP address of the device,
- Port – port number (if the default IP port is used, select the option Use Default Port),
- Node Address – device address,
- Timeout Time – maximum time after which the communication controller will record a connection error,
- Command Delay – delay time between receiving information from the device and sending subsequent data,
- Retry Count – the number of attempts that the driver will make each time until a correct response is obtained from the device (if the value is equal to 0, then the driver will make the default number of attempts).
Use the Finish button to go to the screen editor. To have access to all parts of the project, go to the View tab and select the Project Manager option. After selecting this option, you will see the program tree in the window on the left.
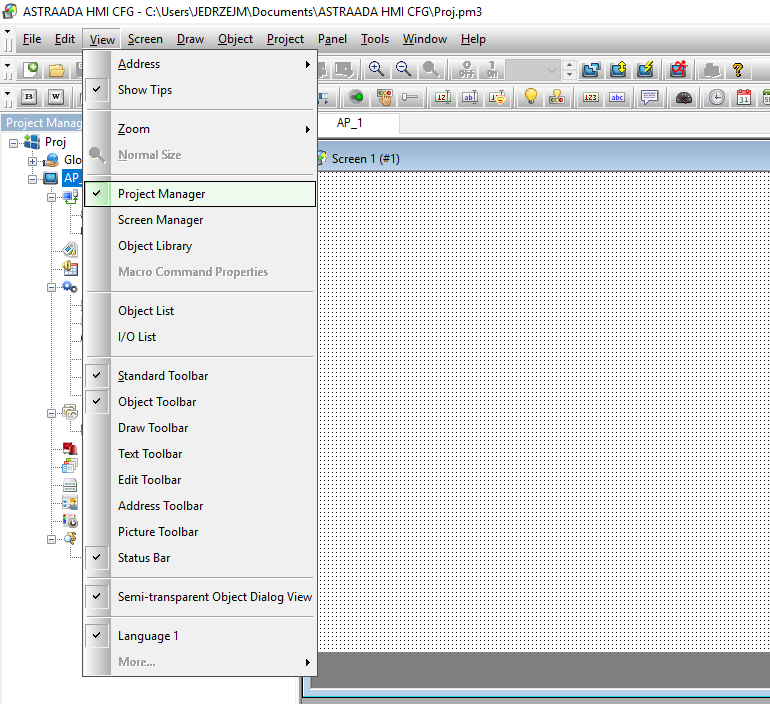
To get more options for a selected design element (e.g. Link Properties), double-click with the left mouse button on one of the options (e.g. Link 1) in the design tree on the left side of the editor.
Physical connection of the panel
To program the panel, connect it to the computer via the USB port. It is necessary to install the USB driver first.
The USB driver for Windows is located in the ProgramFiles/ASTRAADA HMI/Usb directory (the directory where the Astraada HMI CFG application was installed).
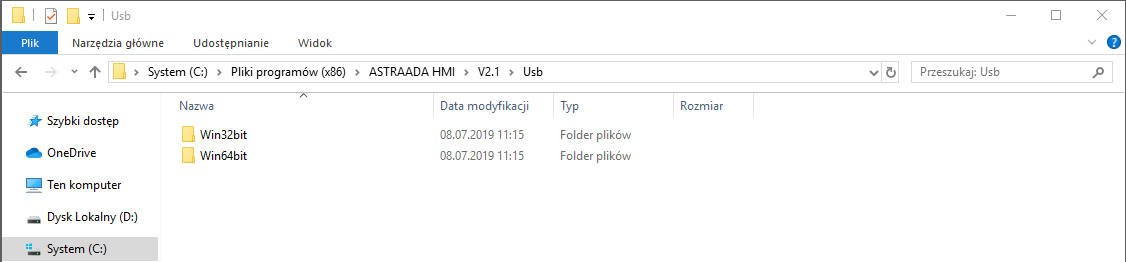
There are two drivers that must be installed to be able to program the panel via the USB port. Select the appropriate version: for Windows 32 bit or 64 bit.
- The µSD port is used to connect an additional µSD card (supported types are: µSD, µSDHC, recommended max. 16GB).
- COM1 port – serial port on the DB9 connector (RS232, RS485, RS422 available).
- COM3 port – serial port on the DB9 connector (RS232 available).
- COM2 port – serial port on the TERMINAL BLOCK connector (RS485, RS422 available).
- Ethernet port (option) – used for communication with external devices and for programming the panel.
Functional information
The following services are built into HMI operator panels with Ethernet ports:
- VNC– remote screen acces
- FTP– file server, access to memory via Ethernet
Access to VNC and FTP services is possible through the panel configuration menu (Panel Setup):
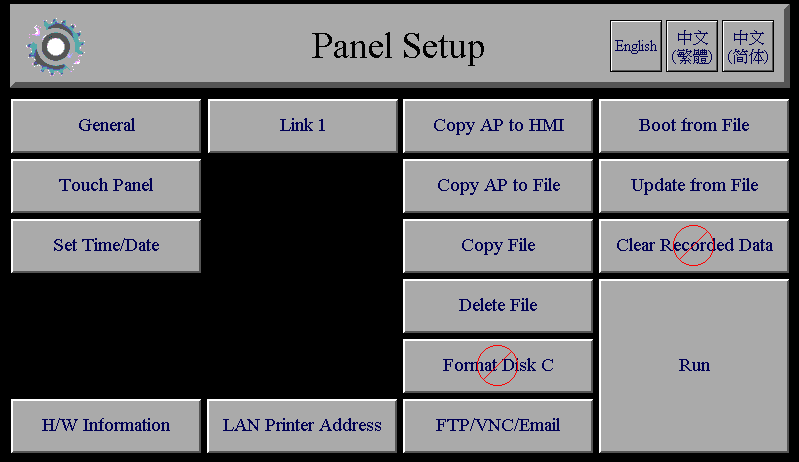
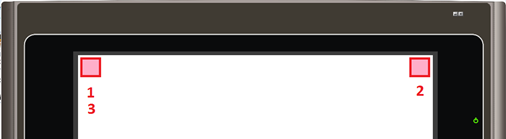
To access the configuration menu in the panel, perform one of two operations:
1.Before turning on the panel power, press the upper left corner and hold your finger.

2. Press the left, then right and then left upper corner of the screen.
If you have any questions at this point of the course, write them in a comment - we will be happy to answer :)
In the next part of the course „How to configure application settings? Interface and basic functions of the development environment. | HMI panel programming course episode 2“ you will learn:
- how to configure the main settings of the new application,
- how to use the help mechanism,
- which functions of the software are worth knowing at the start.
Authors:
Paweł Podsiadło
Ewelina Niziołek
