
How to configure alarms in operator panels? | HMI programming course. Part 7.
During the course you will learn, among others:
- how to add and configure alarms,
- how to display messages using variable monitoring,
- • how to present currently needed data on the operator panel.
In the previous article from the series "What are macros and how to use them in an HMI application? | HMI panel programming course episode 6" we described how to create simple control programs (macros).
In this part of the course, you will learn how to add and configure alarms on operator panels and how to display messages.
HMI panel programming - course for automation engineers
- 1. How to create your first HMI panel project?
- 2. How to configure application settings? Interface and basic functions of the development environment.
- 3. How to add and edit operator screens?
- 4. How to design a graphical interface? Basic graphic objects used in HMI systems.
- 5. What types of variables are used in operator panels?
- 6. What are macros and how to use them in an HMI application?
- 7. How to configure alarms in operator panels?
- 8. How to create and modify recipes?
- 9. How to introduce application automation?
- 10. How to add the process file logging function? How to save data?
- 11. How to ensure communication with the PLC controller? Driver configuration.
- 12. How to limit access to the application? Operator passwords.
- 13. What additional functionalities may be useful when designing an applications?
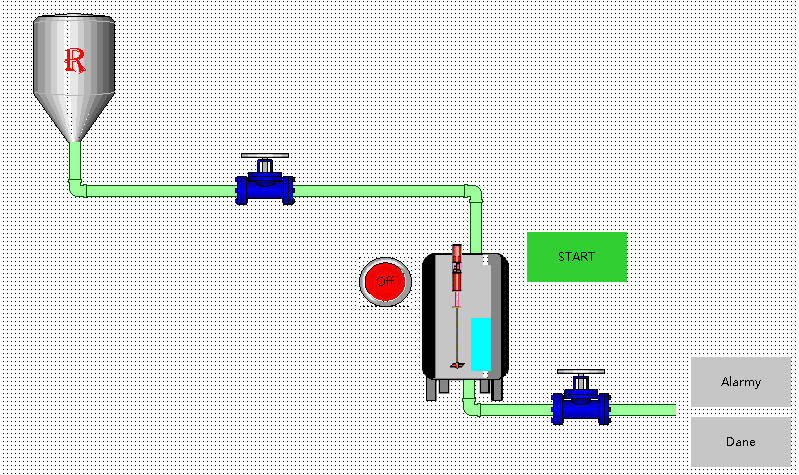
You have achieved the basic functionality of an application that visualises the change in liquid level, which you can observe on a bar graph placed on the tank or in the DATA window.
Now you will add another very important function to your application - alarms. In addition to the natural role of an alarm, i.e. informing the operator of an error/failure occurring during the process, you can also use alarms to display information messages. In our case, these will be messages that the liquid has exceeded a preset level in the tank.
How to add a new alarm?
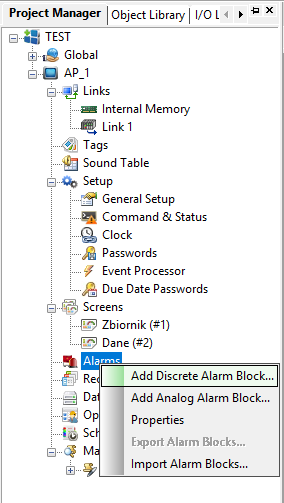
Start by selecting Alarms in the application tree, then add a new discrete alarm by right-clicking Add Discrete Alarm Block.
Configure the alarm according to the figure below. In the TYPE field, select Random Bits to use the variables created in the previous steps.
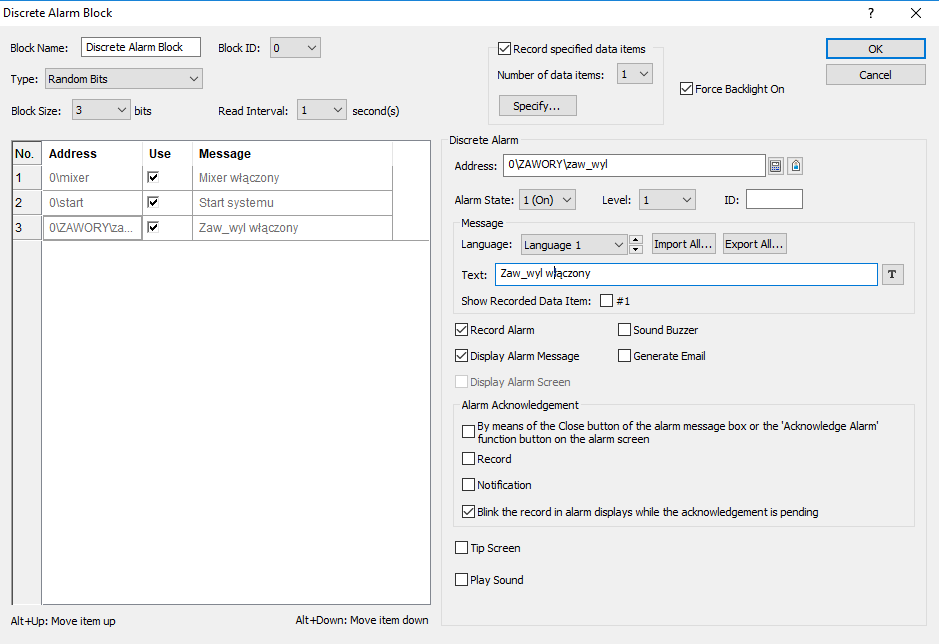
Set the number of variables in the block (Block Size) to 3 and assign the appropriate addresses. To do this, select the first line on the left, and then select Select Tag in the Address field on the right.
Select the start variable and in the Text window assign the message SYSTEM START to it.
In the same way, assign the next messages: MIXER ON to the mixer variable and ZAW_OFF ON to the ZAW_OFF variable.
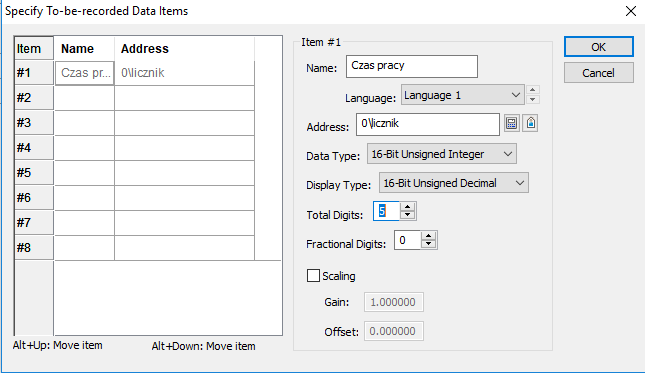
Select the Specify button at the top of the window under Record Specific Data Item. In the opened window, enter the name Working time and select the name of the counter variable. Increase the number of Total Digits to 5. Confirm the changes by selecting OK. Then, in the table on the left, select the variable named mixer and select the Show Recorded Data Item %1 option for it. This will allow the monitored value to be displayed in a message.
Now create a new screen called ALARMS (Screens>New Screen) and change its type to Window Screen (the configuration window opens after double-clicking on the name of the newly created screen).
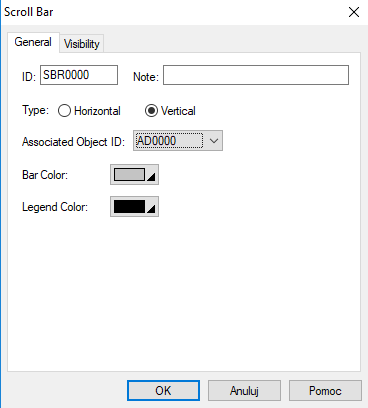
Add the Alarm Display object to the new screen from the Object tab in the top menu and embed it anywhere on the screen. From the same tab, select More Buttons > Scroll Bar, which will be used to scroll the alarm window. To change the orientation of the scroll bar, double-click it and change the Type to Vertical.
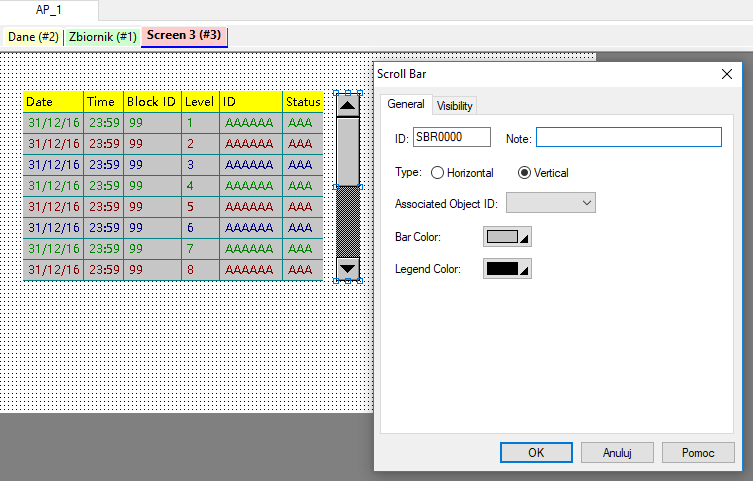
In the same window, assign an object that will be controlled by the sliding bar - there should be one option available, in this case AD0000.
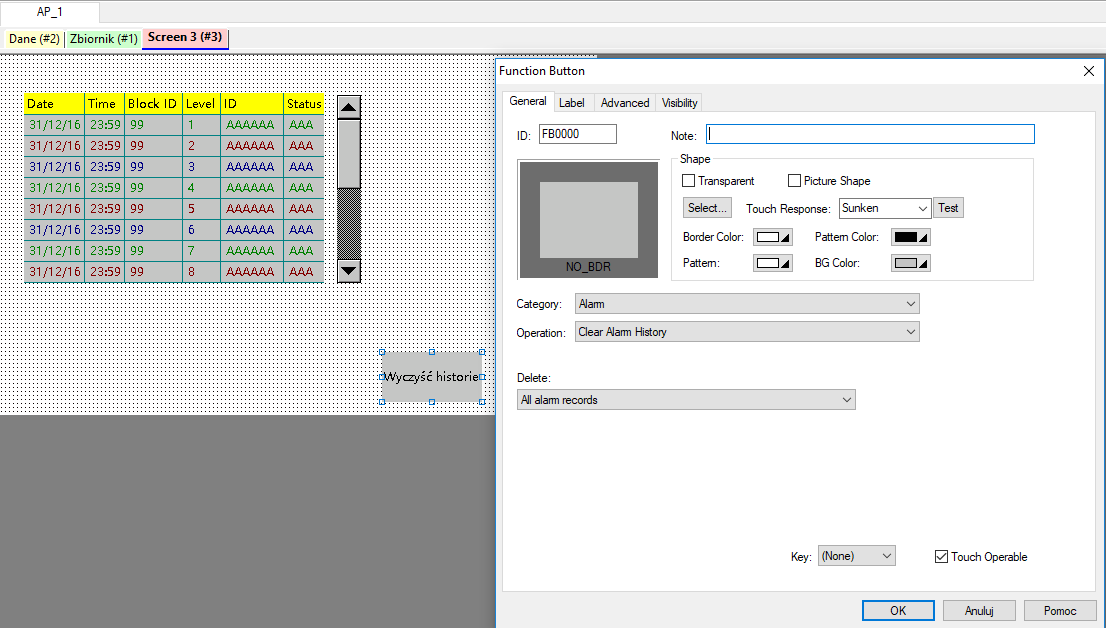
Add a Function Button object to the Alarms screen, which will be used to clear the history of alarms displayed on the screen. Place the object selected from the Object tab in the lower right corner of the screen and enter its configuration by double-clicking on it. Select the Alarm category and the Clear Alarm History operation, then customize the object label in the Label tab.
Now add another button (this time of the Screen Button type) that will be used to close this window and return to the main screen. Instead of creating a new object, go to another DATA window and copy the CLOSE button from that window and paste it next to the newly added CLEAR HISTORY button in the ALARMS window.
Go to the main TANK window and copy the DATA button which opens the window. Place it above the DATA button and in its configuration change the target location to screen number 3 ALARMS, and then in the Label tab change its label.
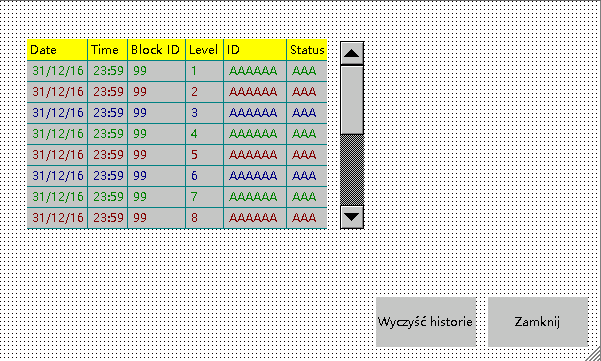
Your screen should look like below.
Testing the program with added alarms
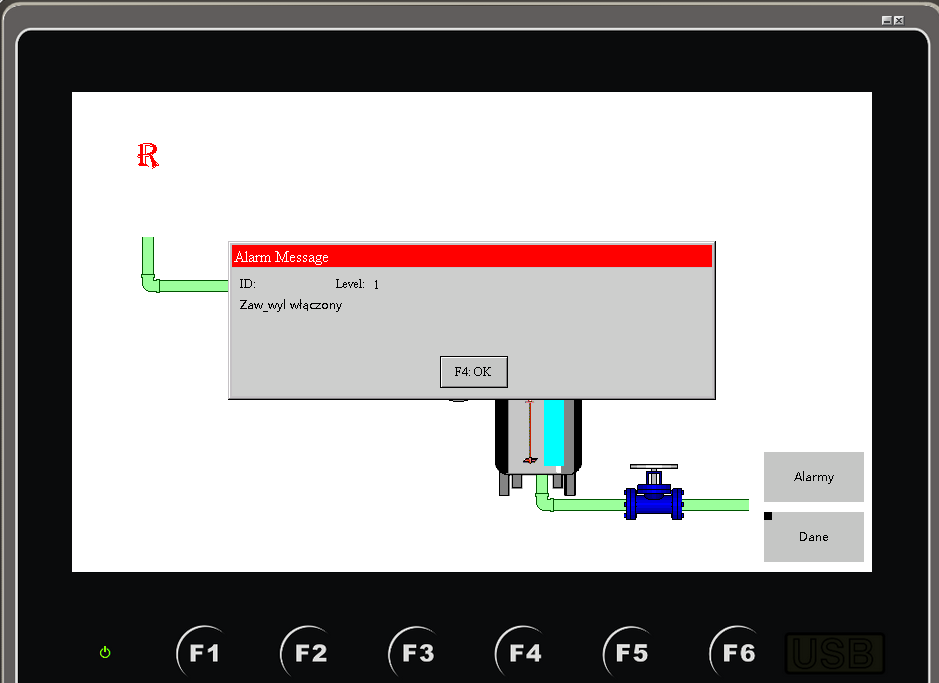
Once you have configured your objects, proceed to test the current state of your application using the simulator you used in the previous steps. After activating the operation with the start button, you should see a series of messages (alarms) you have added along with the change in the liquid level in the container (remember to compile the application first with the Compile button).
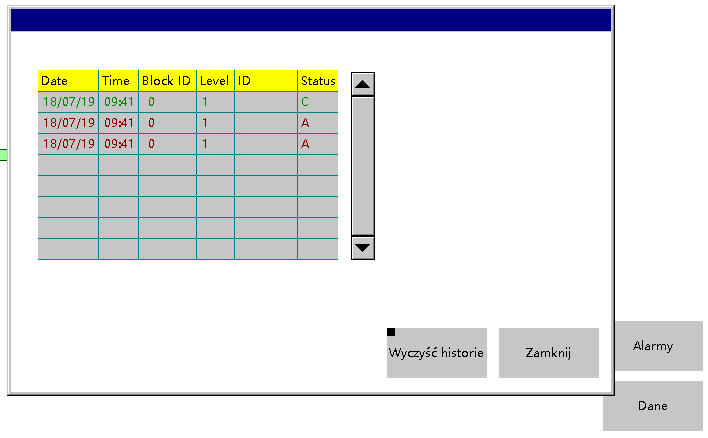
After displaying all messages, go to the ALARMS window, where you should see the recorded events in the table.
Also test the operation of the CLEAR HISTORY button, which should remove all recorded messages from the table.
How to control the value level of a variable and display messages?
In the next step, add another alarm block, this time selecting Add Analog Alarm Block.
Select the monitored variable as the level to which you will immediately assign messages to specific variable values. Note that the table includes Low Low, Low, High and High High levels, for which you can assign appropriate messages to be displayed when the liquid level is below or above a specific value.

Similarly, add the remaining alarms. For the value entered in the Limit window (20,40,60,80), assign messages using the Text window for each item. Accept the changes made by clicking OK.
Compile and save your application to test it in the simulator.
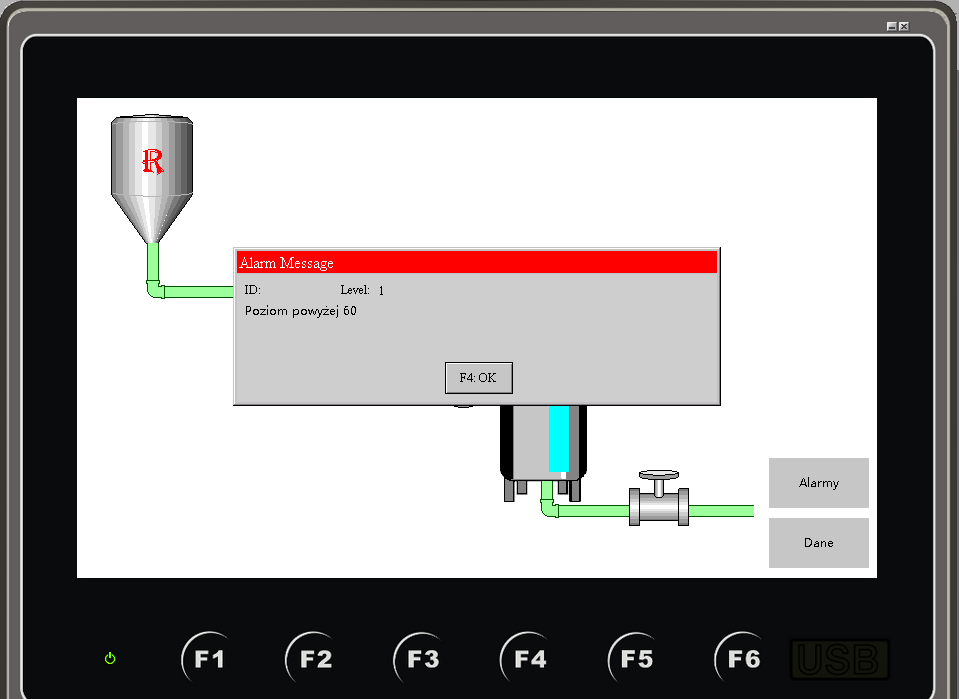
After correctly carried out changes, you should observe subsequent messages as the liquid level changes.
You can also see the messages in the ALARMS window. This time, try waiting until the number of items increases so that you can use the sliding bar to reach the rest of the table.
After testing the application, return to the editor and right-click on the Alarms tab from the design tree on the left and select Alarm Properties.
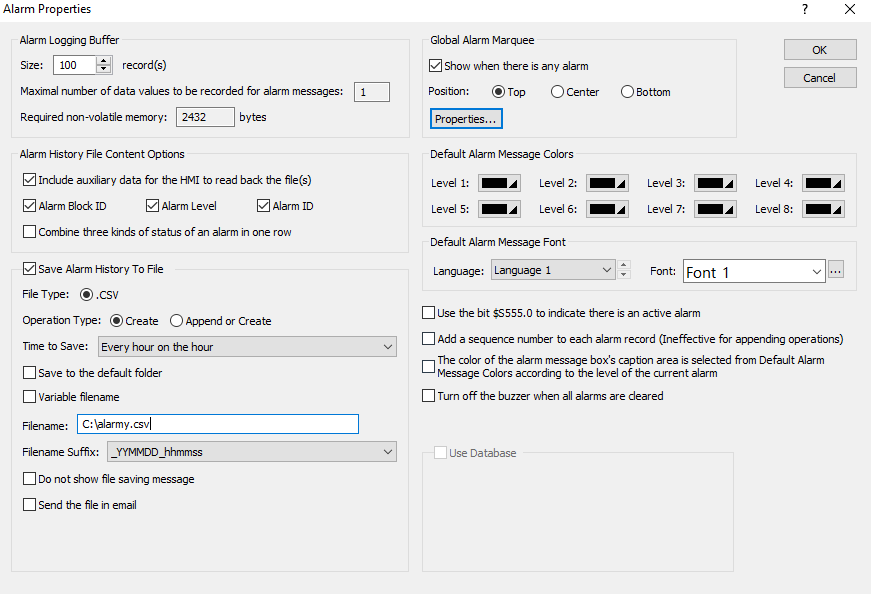
In the displayed window, select the Save Alarm History To File option to save the alarm history in a file whose location you assign in the Filename window in .csv format.
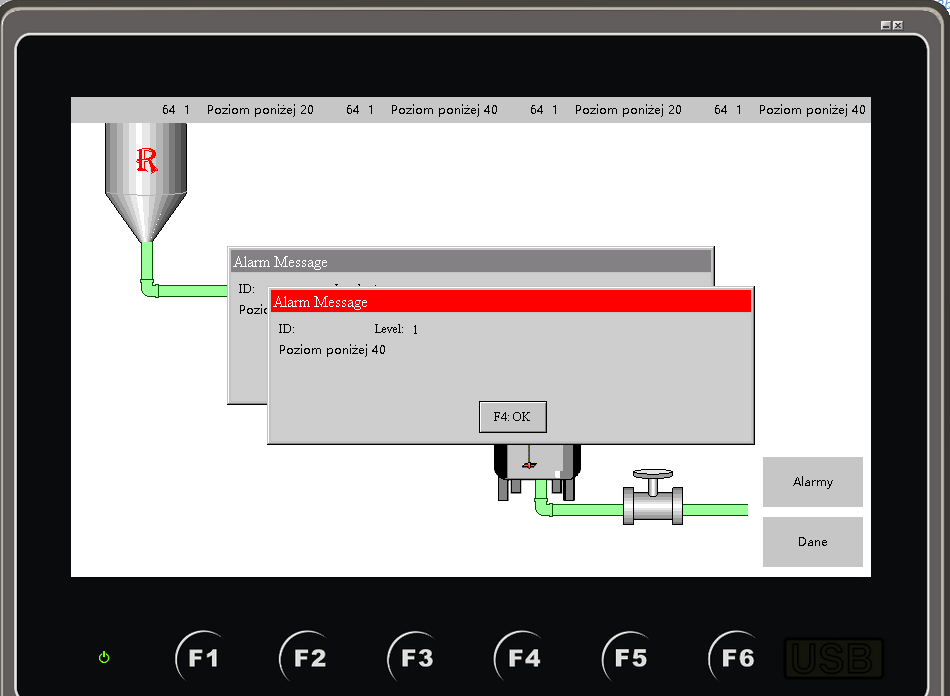
Accept the changes and test the application again. You should see the message display bar described above at the top of the screen, as shown in the simulation below.
If you have any questions at this stage of the course, write them in a comment - we will be happy to answer :)
In the next part of the course "How to create and modify recipes? | HMI panel programming course episode 8” you will learn:
- how to create a recipe in an HMI panel application,
- how to upload and download recipes to/from the PLC controller,
- how to manage recipes and change their values.
Authors:
Paweł Podsiadło
Ewelina Niziołek
